
This article describes automating the process of provisioning an Azure VM (Virtual Machine) and tearing it down. Before we start, let’s clarify few terms:
Azure
When we talk about Azure it is understood that we’re talking about Microsoft’s public cloud offering. This is sometimes referred to as Azure commercial. In Powershell, this is referred to AzureCloud. Microsoft has separate clouds from Azure such Azure US GOV cloud for US Government organizations (not available to the public).
ARM vs ASM
Azure has two APIs/modes;
There are different capabilities between resources provisioned in each mode. This article will use Azure ARM (new) portal, API, Powershell cmdlets and capabilities.
Azure Powershell
To get started with Azure Powershell, you need to download and install the Microsoft Web Platform installer.
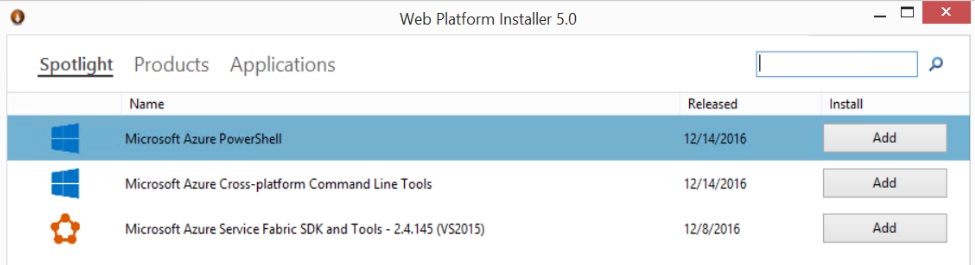 Microsoft Web Platform installer
Powershell version 5 which comes with Windows 10 and Server 2016 is required. Windows 8, 8.1, Server 2012 and Server 2012 R2 can have their Powershell 4 upgraded to 5. To see your Powershell version, in Powershell ISE type in $PSVersionTable
 PSVersionTable
Obtaining the script
The script can be downloaded from the Microsoft Technet Gallery under Windows Azure.
Script Input
The script takes the following parameters:
Get-AzureRmLocation | sort Location | Select Location
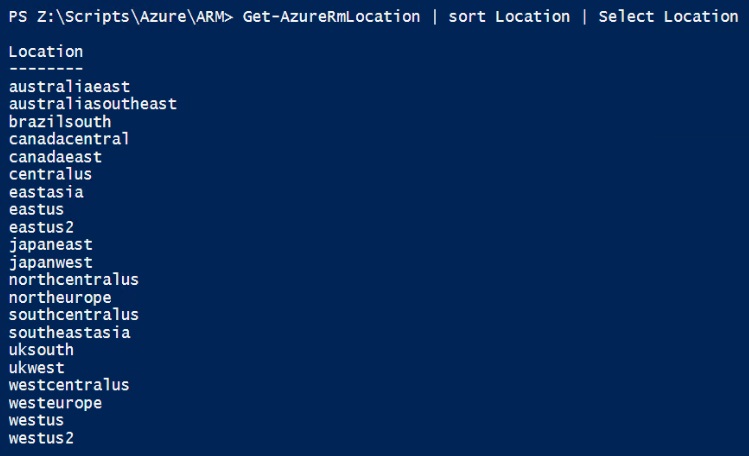 Azure Locations
(Get-AzureRoleSize).RoleSizeLabel
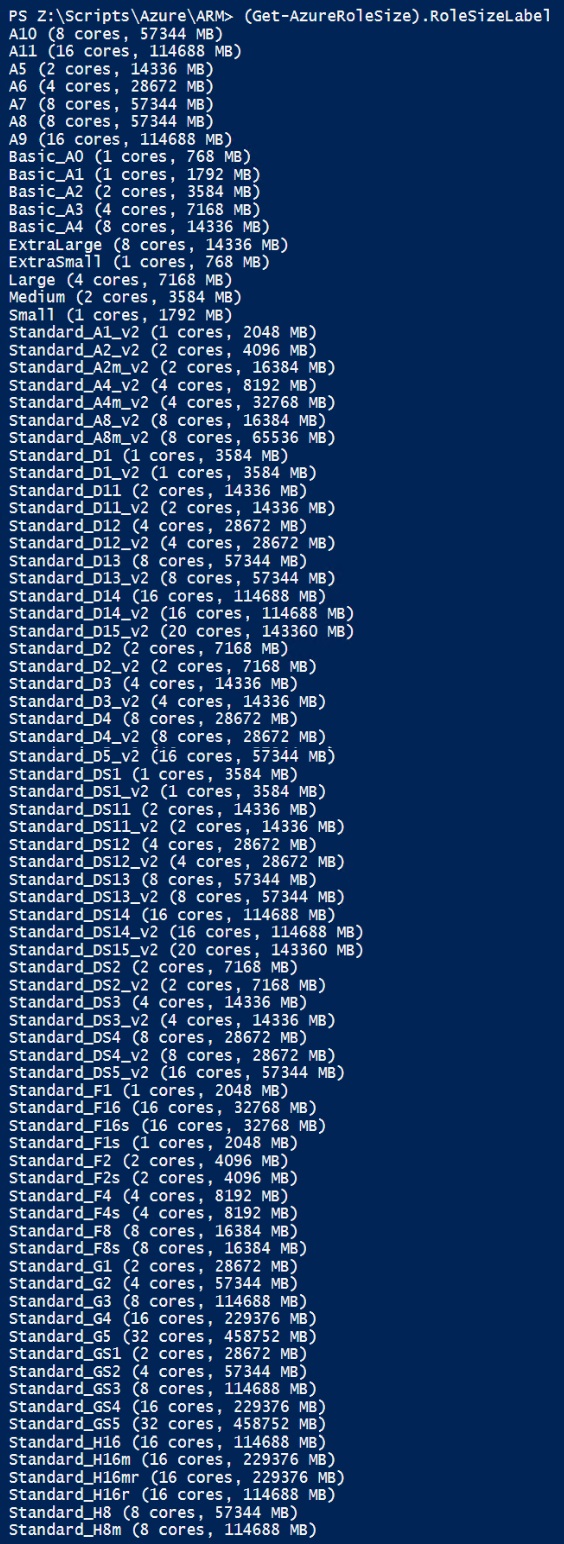 Azure VM Sizes
Here’s a sample script output:
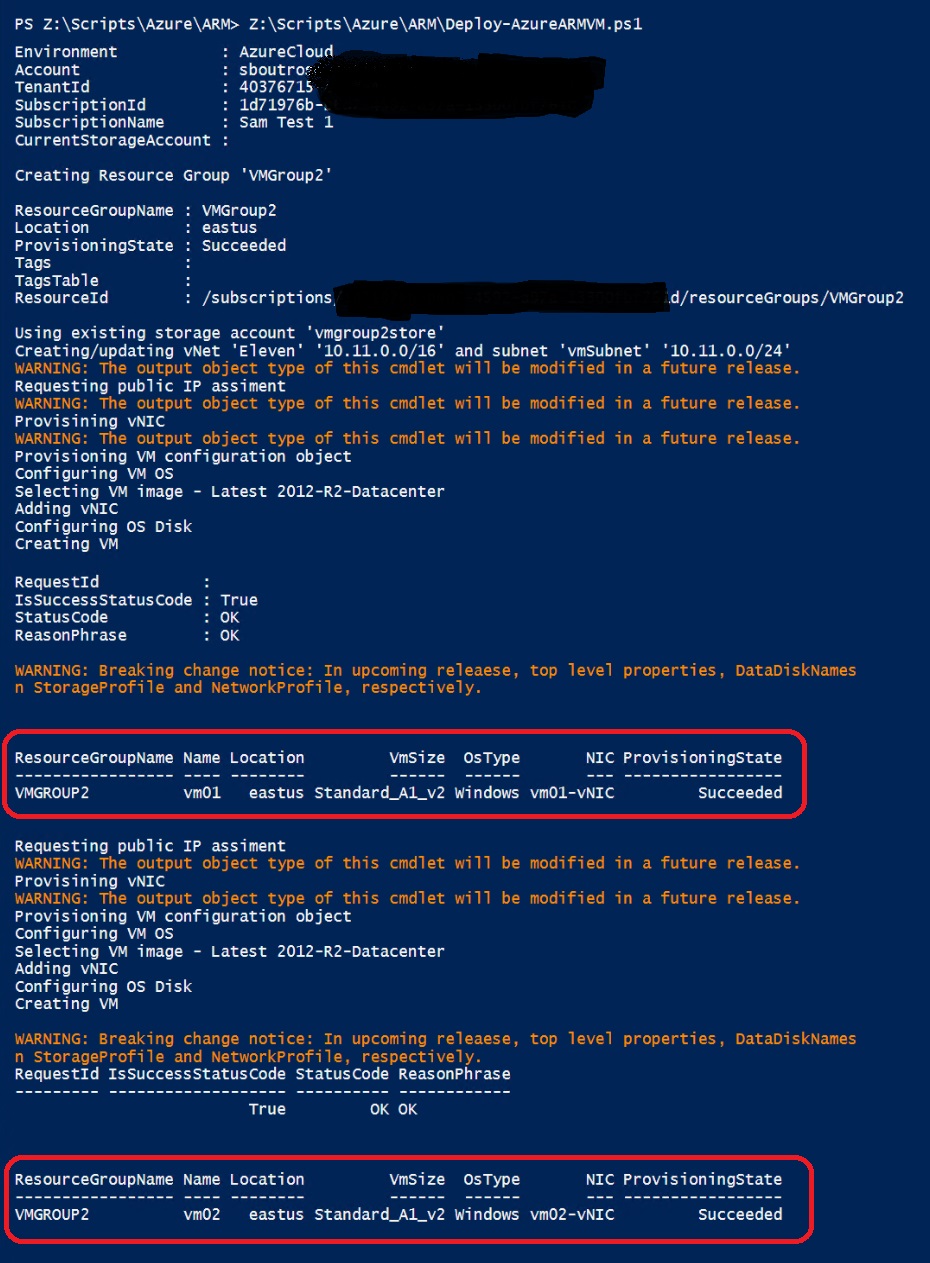 Deploy Azure ARM VM Script Output Sample
You can also view all the objects created by the script in the Azure portal:
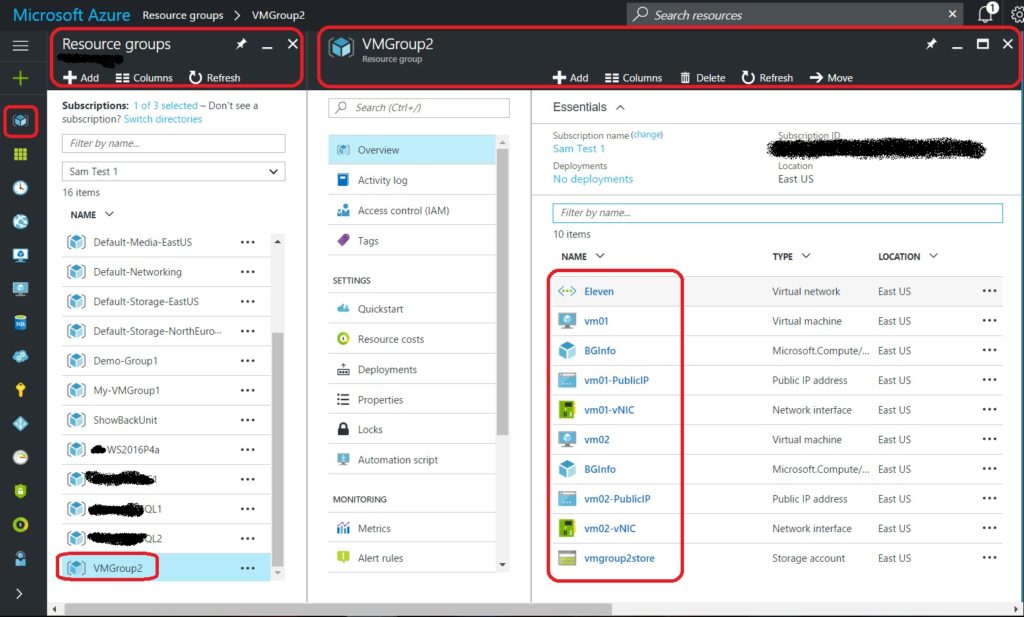 Azure VMs created by Deploy Azure ARM VM Powershell script
Click on the Resource Groups icon towards the top left to open the Resource Groups blade. Click on the ‘VMGroup2’ resource group that was created by the script to open the ‘VMGroups2’ blade. Review all the objects created by the script and their properties.
Tearing down is fairly simple, and it demonstrates the power of resource groups. Simply delete the VMGroup2 resource groups, and all the objects under it are deleted automatically.
For large scale deployments, complex deployments, and advanced features and capabilities, contact Exigent Azure Consulting team.
Daniel Haurey Jr. is the president and founder of managed IT services provider Exigent Technologies, which he founded in 1997. Under his leadership, the MSP has earned accolades ranging from Channel Futures MSP 501 to being named SonicWall’s 2024 MSP Growth Partner of the Year. Dan is a true entrepreneur, dedicated to growing, investing in, and mentoring small businesses. You can find him on LinkedIn, where he regularly posts about technology, business, leadership, and community.